


How to Send a Reconfirmation Opt-in Campaign
A reconfirmation opt-in campaign helps you verify that your subscribers still want to receive your emails. This is a useful way to maintain a healthy mailing list, improve engagement, and ensure you're only sending to subscribers who have provided valid consent.
To get started, upload your List via CSV file, please follow the instructions:
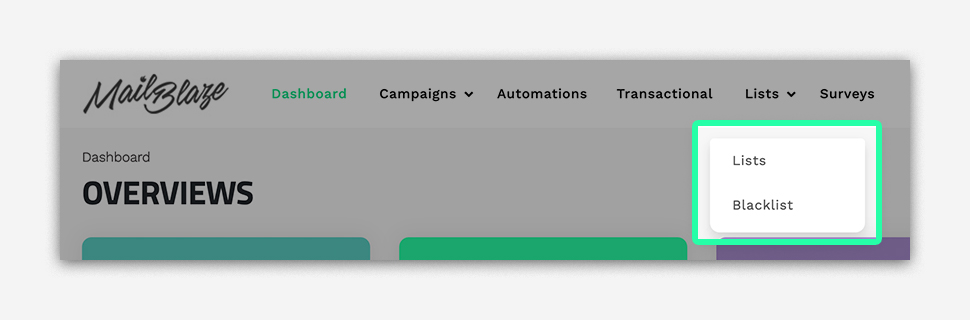
On your DASHBOARD, you’ll need to select LISTS > LISTS as per below.
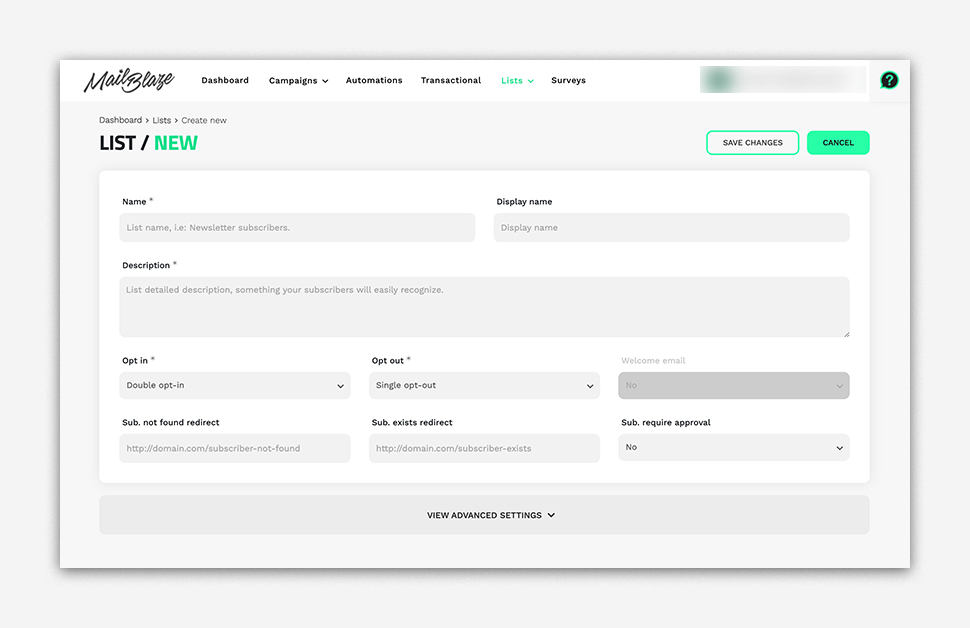
Enter specific details regarding the list you want to create with the form provided and click SAVE CHANGES.
Upload your CSV file. Here's an example of a CSV file format:
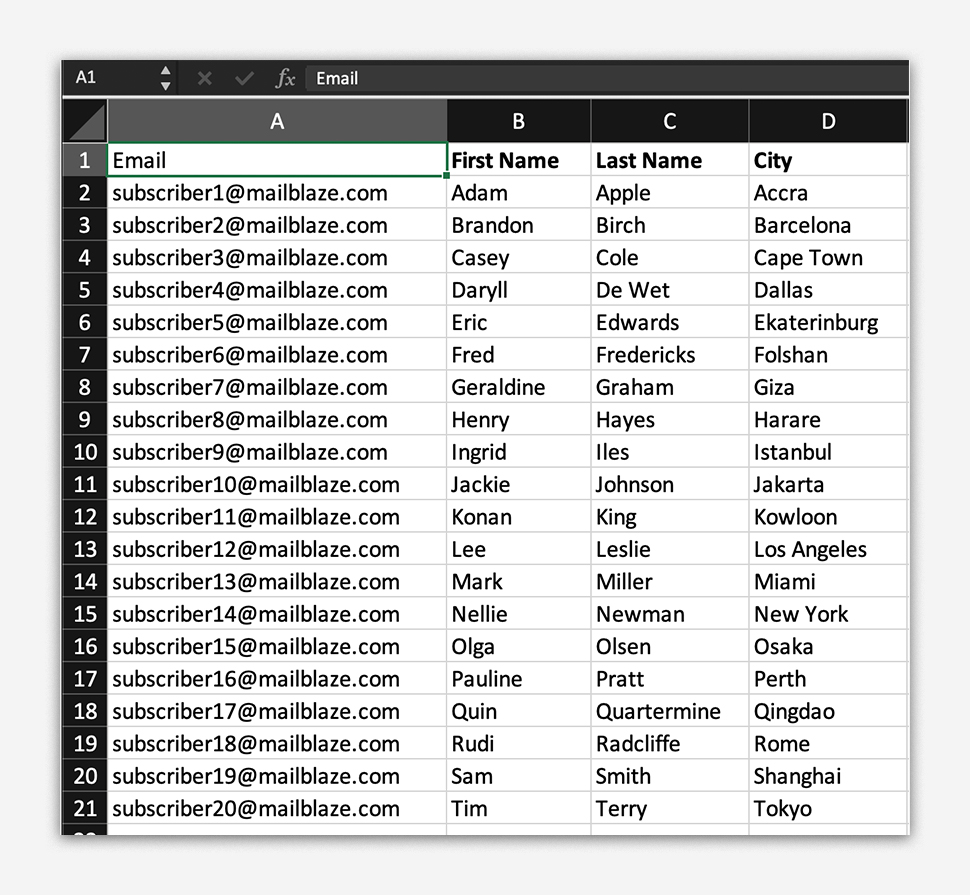
PLEASE NOTE: It’s important to include the Opt In Time, Opt In Date, and Opt In IP Address to ensure that the system detects that these are a consented subscribers. Otherwise, your list will be UNDER REVIEW
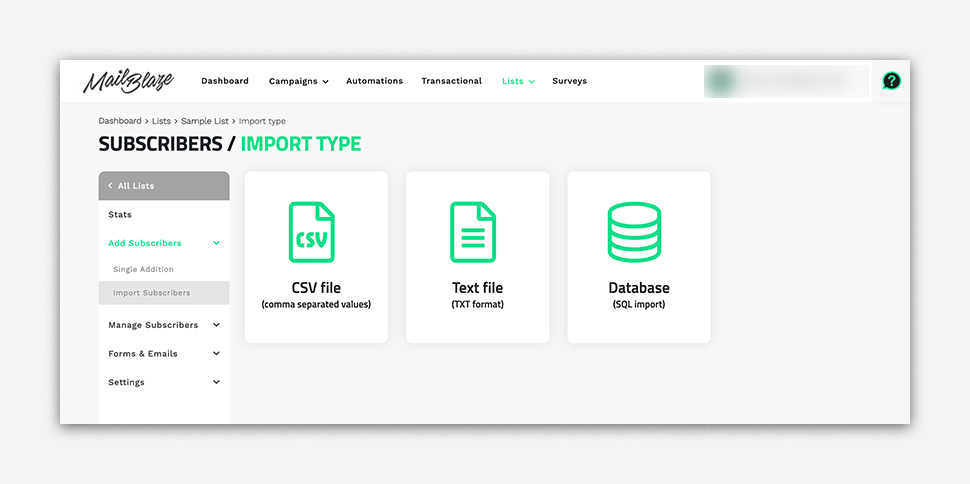
Select CSV as your import method from the options shown on the IMPORT TYPE SCREEN.
Drag your file into the section where you see, UPLOAD FILE or alternatively click on the section and choose your file from where it is located on your computer via FILE EXPLORER or FINDER (Mac OS).
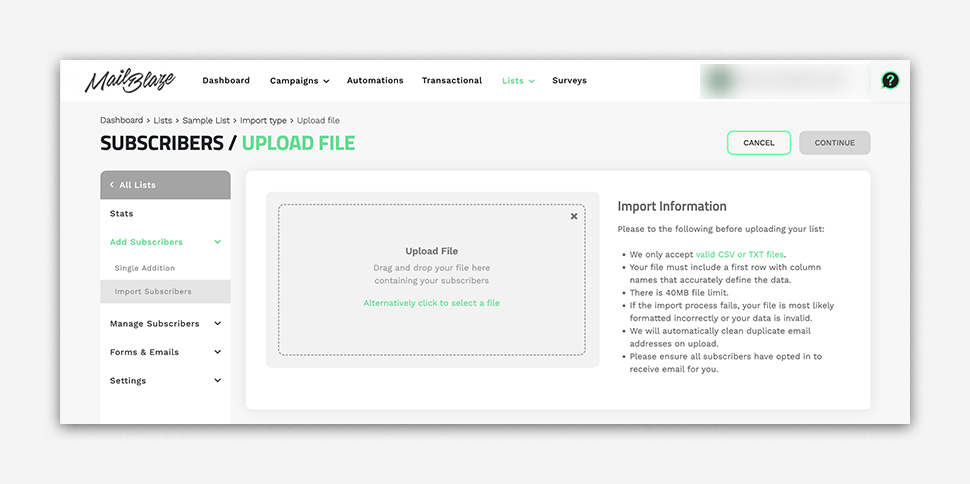
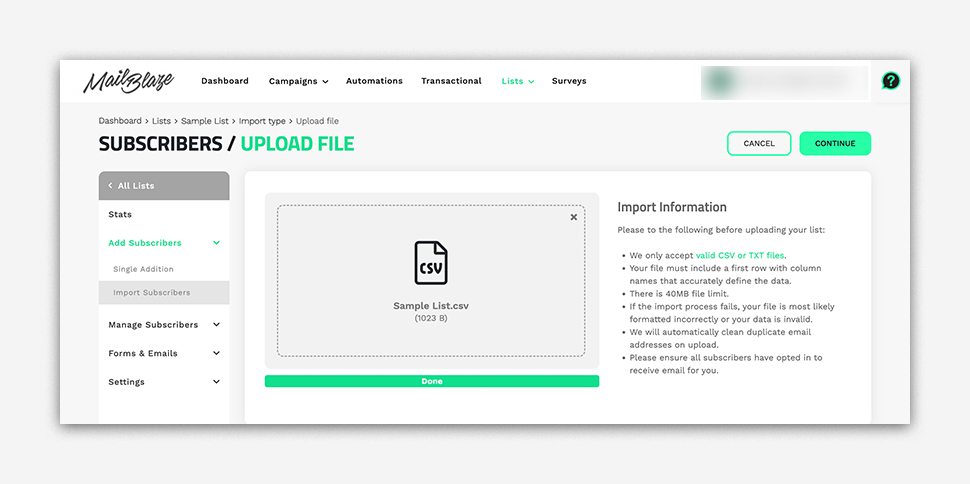
Once your file is uploaded, select the CONTINUE button.
Match the COLUMNS.
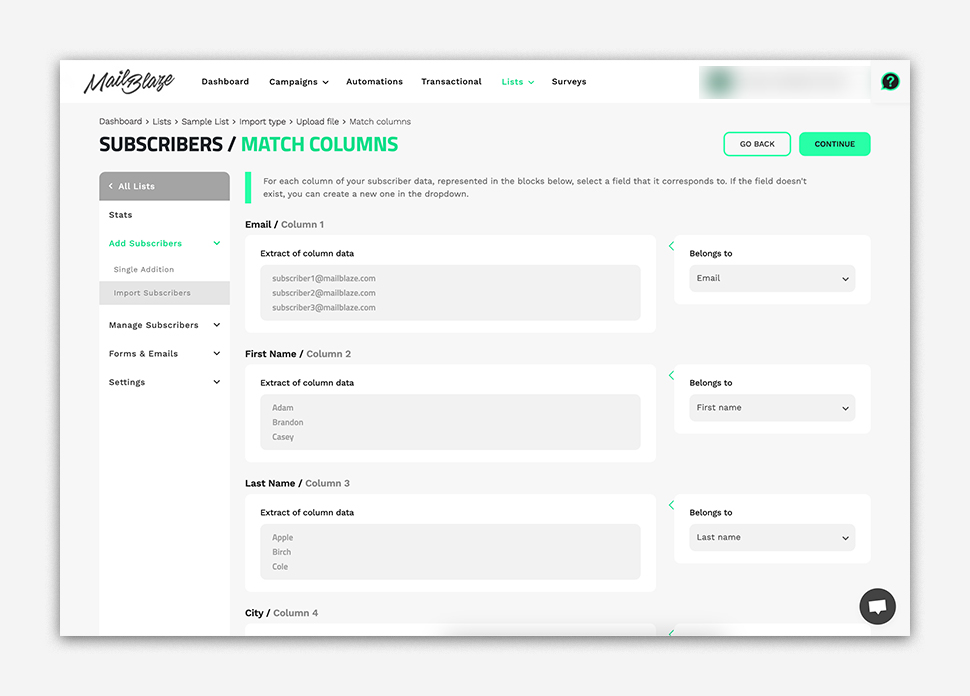
PLEASE NOTE: You can either choose AUTOMATIC FIELD CREATION or CREATE NEW FIELD.
For the AUTOMATIC FIELD CREATION, you will use the existing Custom field based on the column’s title header on your file.
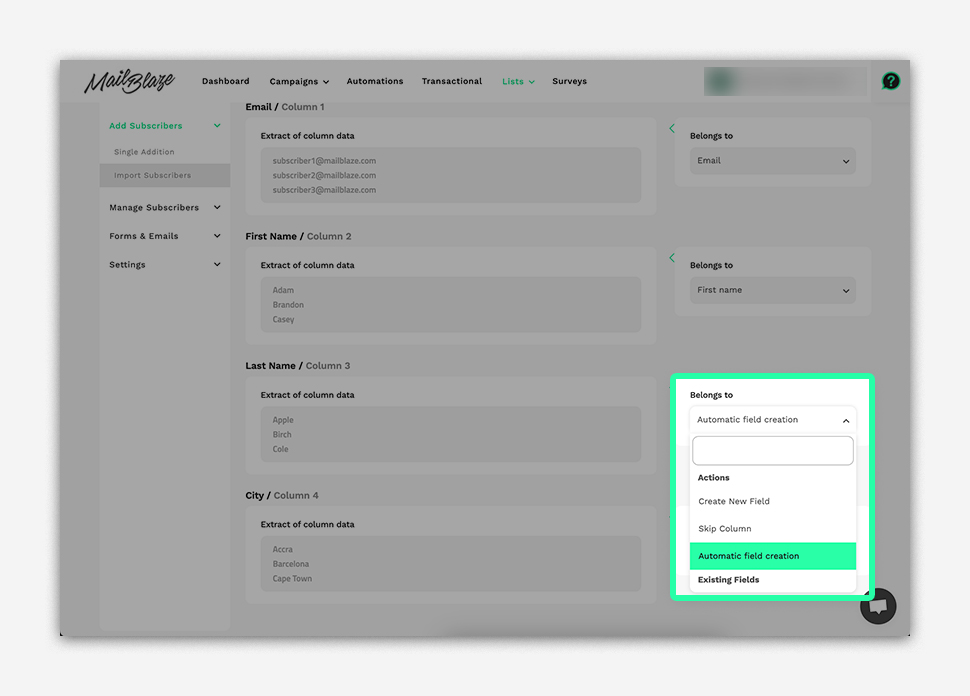
If you choose CREATE NEW FIELD, you will have to create the CUSTOM FIELD for each column by filling out the TYPE, LABEL and TAG
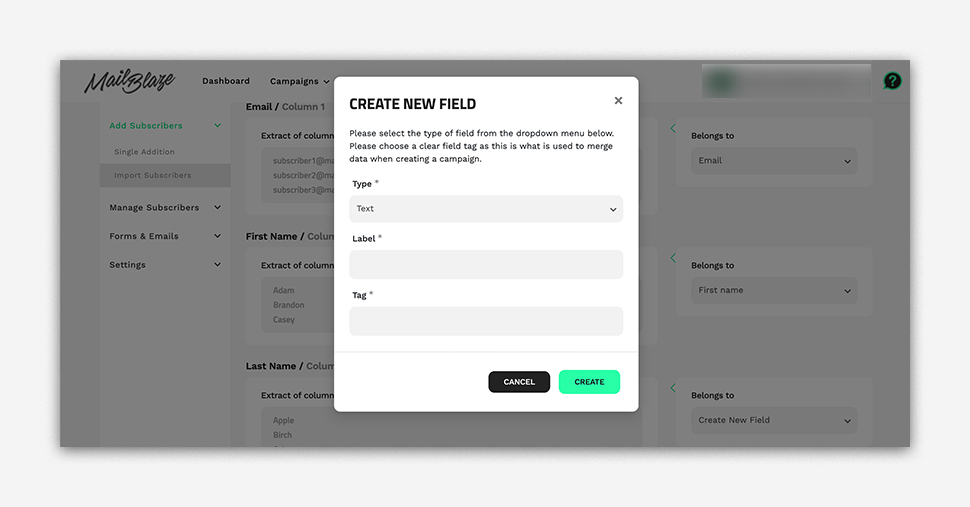
When you upload, a pop-up window will appear:
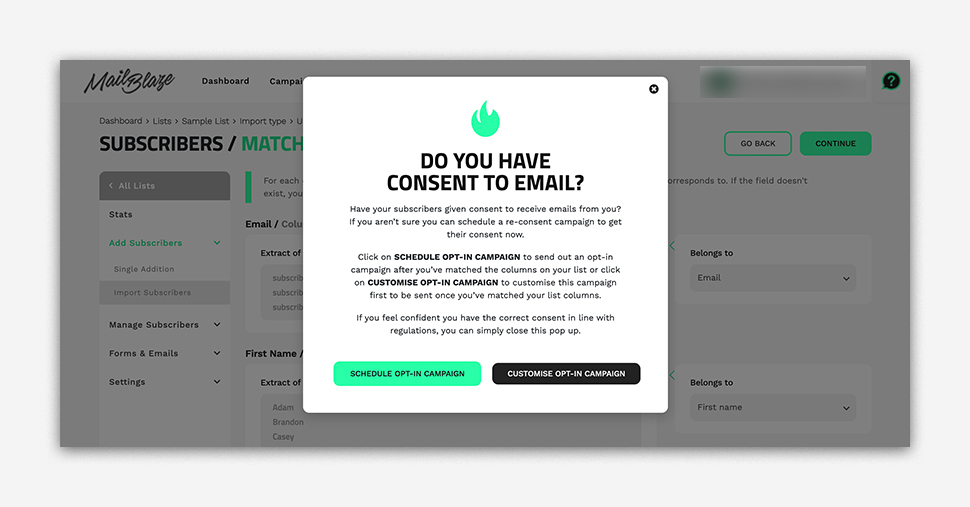
When you select SCHEDULE OPT-IN CAMPAIGN, a confirmation email will be sent to your subscribers to verify their desire to stay on your list. This approach enhances engagement and keeps your community informed.
To add a personal touch to the confirmation message, click on CUSTOMISE OPT-IN CAMPAIGN.
Choosing SCHEDULE OPT-IN CAMPAIGN will automatically send an email to the subscribers on your newly uploaded list.
If you select CUSTOMISE OPT-IN CAMPAIGN, the reconfirmation email template will open. This email is sent to your existing subscribers after the import is completed. Use this opportunity to explain why you're asking them to reconfirm their subscription and encourage them to click the confirmation link so they can continue receiving your emails.
Customise the email template by adding your branding, updating the content, and including a clear call to action that encourages subscribers to confirm their subscription. Once you're happy with the design, click SAVE AND NEXT.

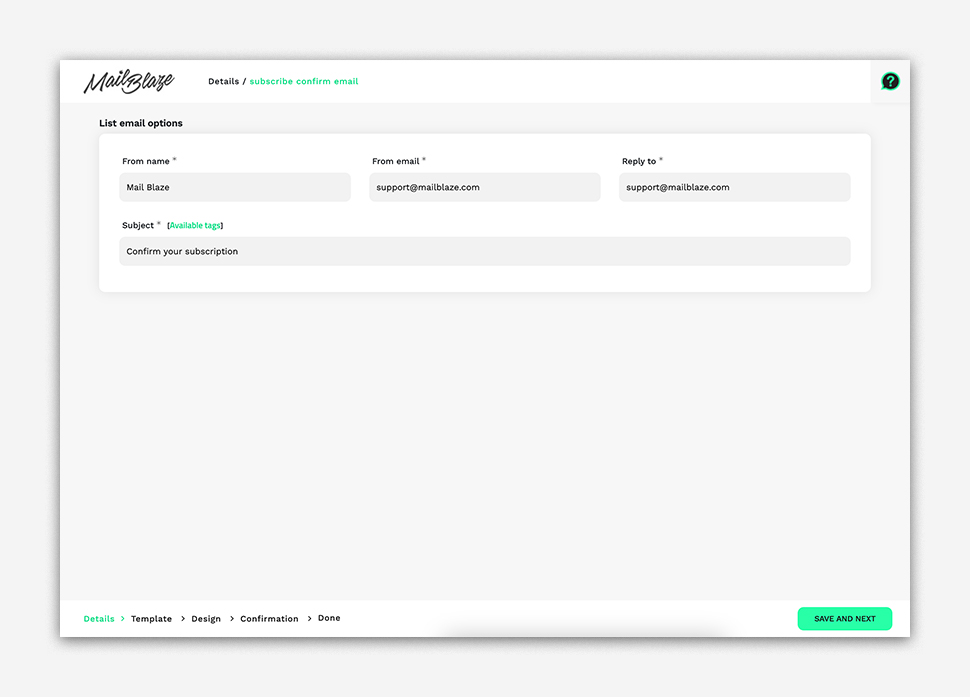
To proceed, enter the From Name, From Email Address, Reply-To Email Address, and Subject Line, then click SAVE AND NEXT.
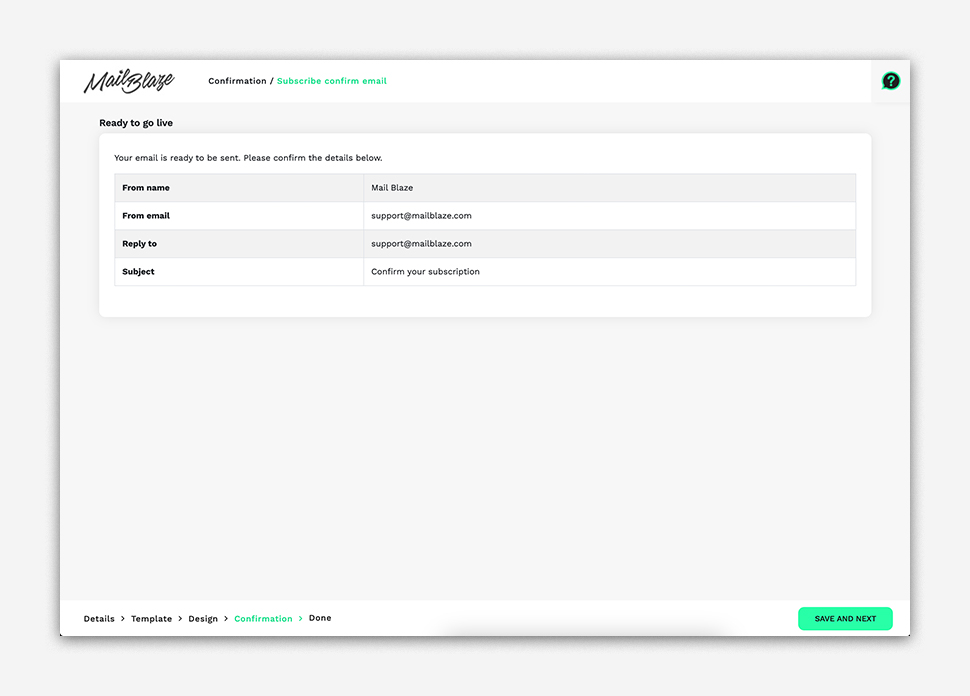
This will be the summary of the Subscription Confirm Email, just click on SAVE AND NEXT.
Once you selected SCHEDULE OPT-IN CAMPAIGN, and your import is finished, a confirmation email will be sent to your subscribers.
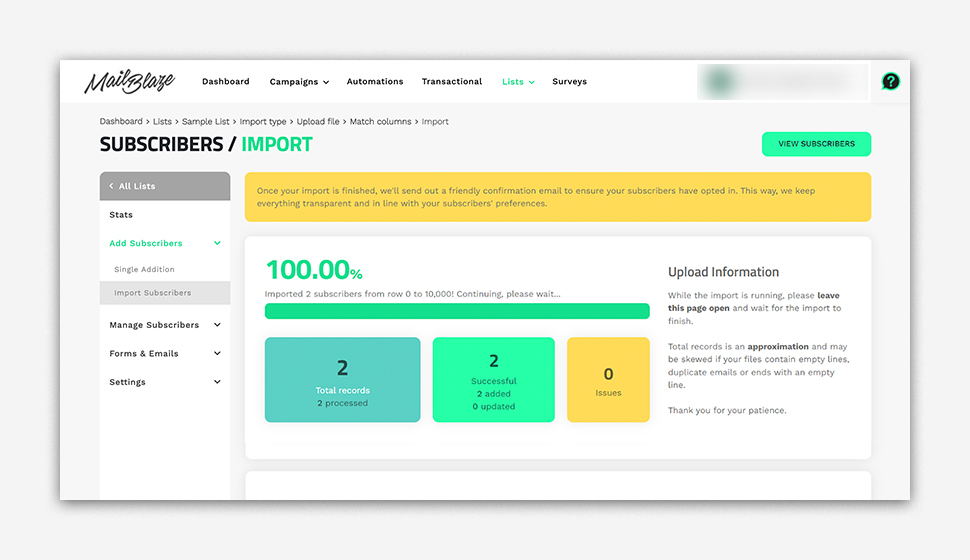
When new subscribers are added, they'll receive a confirmation email that you've customised. To complete their subscription, they'll need to click on the link provided in the email.
PLEASE NOTE: If they don't click on the confirmation link, their subscription status will stay as UNCONFIRMED. This means they won't receive any campaigns until they click the confirmation link and their status changes to CONFIRMED.